-
Notifications
You must be signed in to change notification settings - Fork 191
Import of Forests and Single Trees
To import forests and separate trees simply check the option  Import forests and separate trees (see the image below):
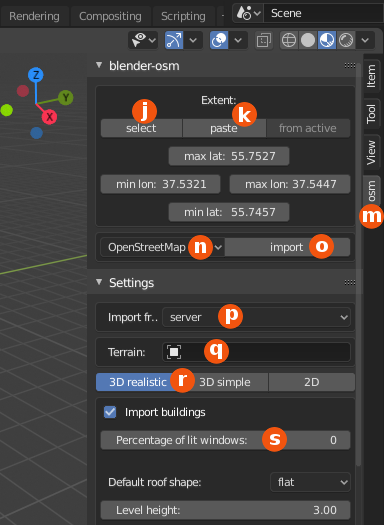

At the moment only one setting is available for the import of forests and single trees: The number of trees per hectare (see the image below). One hectare is equal to 10,000 square meters, e.g. a plot 100m x 100m.

Please note that large forests typically contain millions of trees. So it makes sense to decrease significantly the number of trees per hectare for that case.
If the terrain is set in the field  , forests and single trees will be planted on the terrain. If the field
  is preserved empty, a flat terrain will be created by the addon and forests and single trees will be planted on the flat terrain.
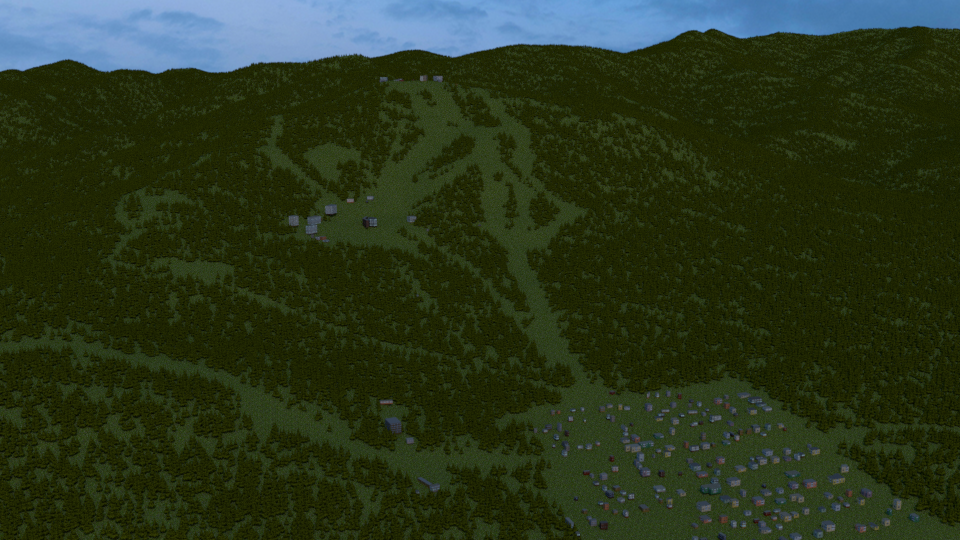
After pressing the button import  and rendering the result of the import, you should get an image similar to the one at the top of this page.
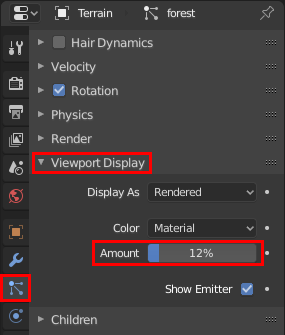
Please note that the total number of forest trees displayed in the Blender 3D View can't exceed 10 thousand for performance reasons. The number of trees displayed in the 3D View is defined by the integer percentage of trees to be displayed rather than the exact number. That means that no tree is displayed if the total number of forest trees is above one million. However all trees will be rendered by Blender. To change the percentage of forest trees displayed in the Blender 3D View, select the terrain, activate the tab Particles in the Properties window, find the panel Viewport Display and the field Amount (see the image below).
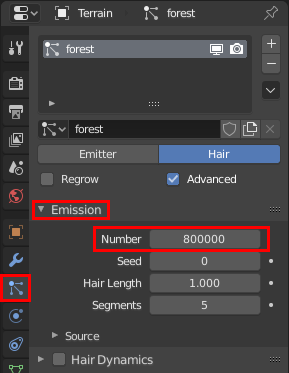
To change the total number of forests trees (i.e. the forests trees to be rendered) select the terrain, activate the tab Particles in the Properties window, find the panel Emission and the field Number (see the image below).
At the moment only one model of the low-polygon tree is supplied with the blender-osm addon. It's located in the file vegetation.blend of the asset pack. To use your own tree models for the imported forests and single trees, open the file vegetaton.blend and create or import your own tree models. Set the rotation angle along the Y-axis to 90 degrees for each of your own tree models. Do the following actions for each of your models for that:
- Select the model
- Activate the tab Object in the Properties window, find the panel Transform and the field Y under the column Rotation (see the image below):
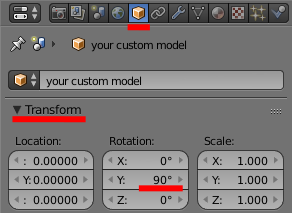
- Set the field value to 90 degress.
Finally add your own models to the Blender group trees as described below:
- Select your models one after another holding the key
SHIFT. At the end all your models should be in the selected state. - Select the the model pine low poly still holding the key
SHIFT. That action makes the model pine low poly active and preserve the selected state for your own models - Press
SHIFT+CTRL+Gand select trees in the popup window - Save the file vegetation.blend
Your own tree models will be used for subsequent imports of forest and single trees from OpenStreetMap.
To prevent a tree model from participating in the import of forests and single trees, remove the model from the Blender group trees: select the model in question, press CTRL+ALT+Gand select trees in the popup window.
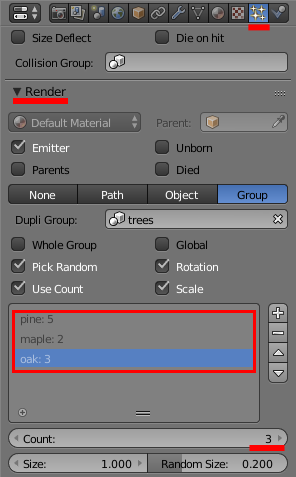
It's possible to specify how often your tree models appear in the imported forests. Select the terrain after the OpenStreetMap import. Activate the tab Particles in the Properties window, find the panel Render and the one-column table where all tree models from the Blender group trees are list with their relative weights (see the image below). Select the desired entry with the name of the tree model in the table and enter its relative weight. A large weight of the tree model means that the tree model will be used more often in the forest.
